
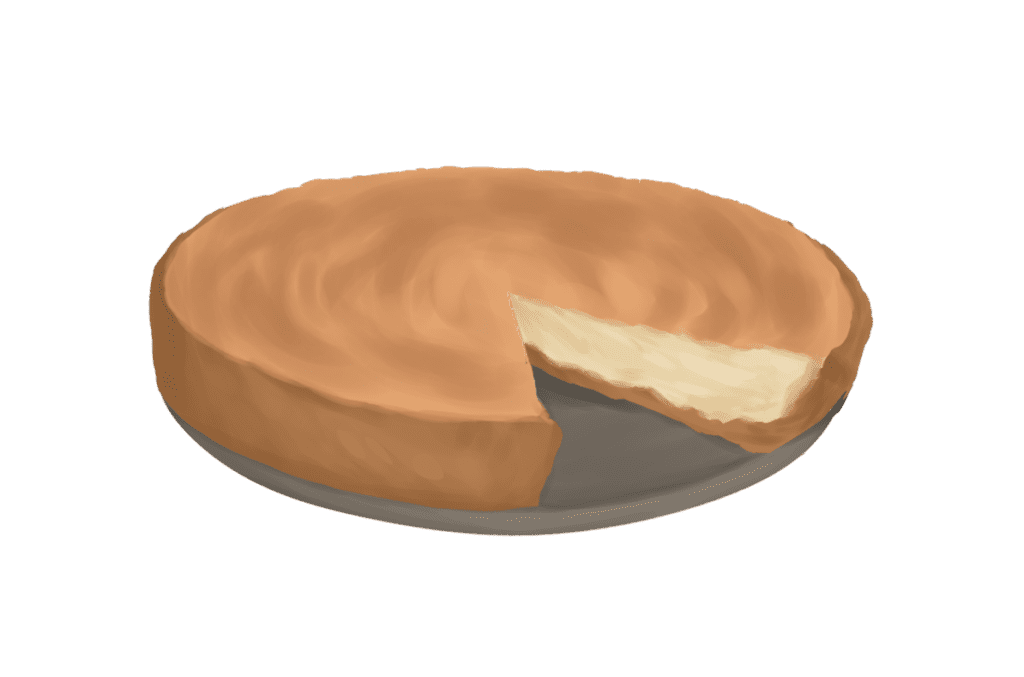
Convenient Homemade Cheesecake Recipe

Ever since I heard of cheesecake, it’s been on my Top 10 Things to Eat list. But alas, at the time, no restaurants where I live had it on their menu, and there was no cream cheese available anywhere. So after years and years of looking at other recipes, giving up, moping, and looking for tricks and hacks, I finally managed to make it; in fact, I came up with a recipe that can be made in an electric oven or microwave, and even a no-bake alternative.
Of course, I perfected the recipe when some restaurants added it to their menu. But you won’t need cream cheese or any other troublesome ingredients with my version! You will see that with the right technique and attention to detail, making cheesecake at home can be a breeze. In this recipe, I’m going to show you how to make a cheesecake that is both beginner-friendly and totally delicious with step-by-step instructions.
Ingredients:
There’s nothing complicated about this, which is just the way I like it! The most amazing desserts are often made with simple ingredients. What’s even better about this recipe is that once you’ve tried it, you’ll realize it’s completely adaptable. You can add different flavours and fillings, such as chocolate or various fruits (use common sense, though; don’t put in anything like pineapple that will cause unexpected reactions), and even double the ingredients (if you like it taller and have enough ingredients, which I didn’t, lol). What you’ll need is as follows:
For the crust:
25 Marie biscuits (or any equivalent)
6-7 tbsp salted butter
For the filling:
200gm cheese curds [1 litre of milk yields 100 gm] or cream cheese
½ cup condensed milk
1 egg
1 tsp lemon juice or any desired essence/extract
Directions:
Step 1:
Preheat your oven to 175°C for 10 minutes.
Step 2:
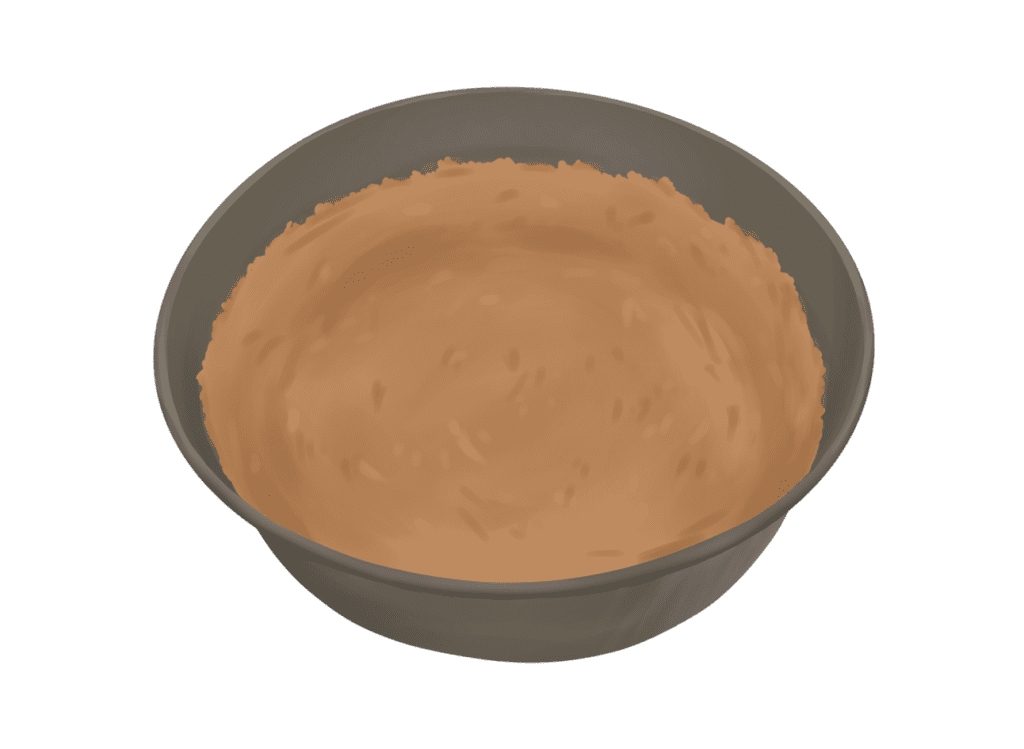
Crush the biscuits in a Ziploc bag or a food processor.
Microwave the crushed biscuits with the salted butter until it melts for about 1 minute, and mix thoroughly.
Using a glass or a small bowl with a flat base, press this mixture into the bottom and halfway up the sides of a springform pan. I suggest the springform pan as the sides are easily removed, and your cheesecake will be perfectly intact. But you may use any dish you like if you don’t intend to lift the whole cheesecake out of the mould.
Pre-bake your crust for 15 minutes in an electric oven or 2 minutes in the microwave. (I skip this step, though, as I find it redundant.)
I like to leave the result in the refrigerator for 10-15 minutes, or at least until my filling is made, which I will get to next.
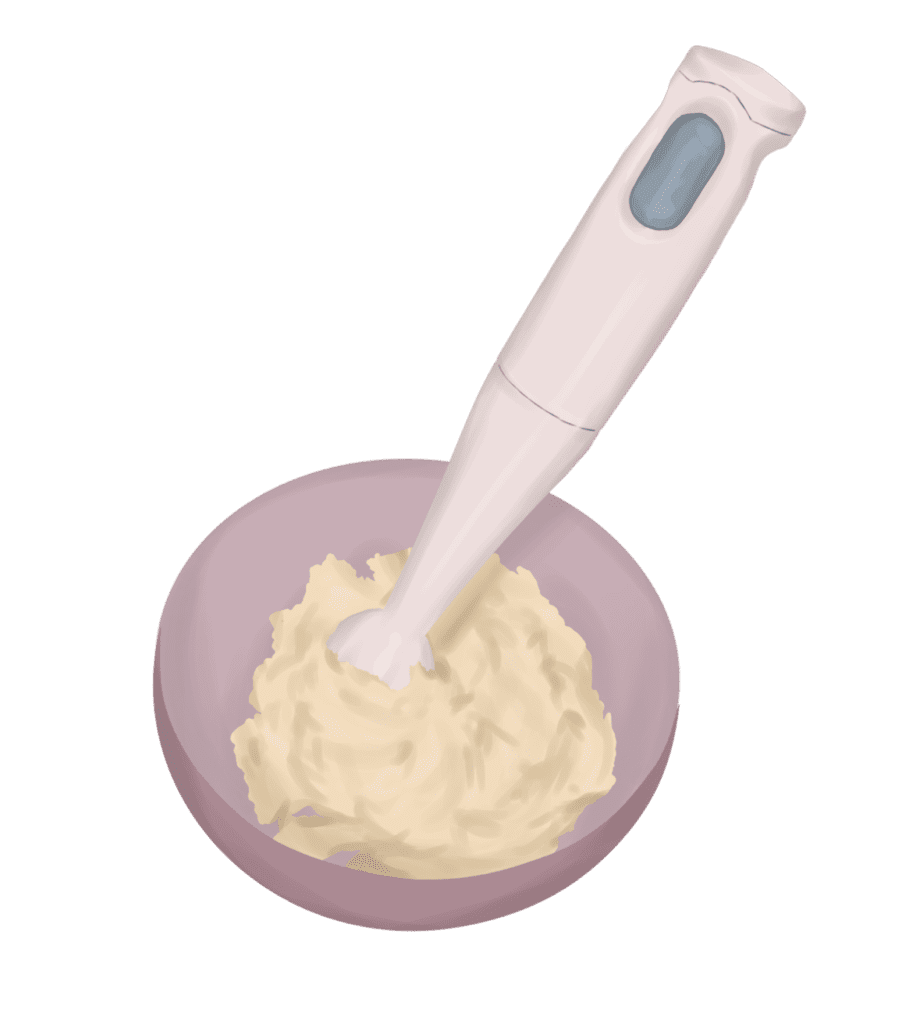
Step 3:
Blend the cheese curds with a little water, about 3 teaspoons worth, until smooth. Do not blend too much or too little. Trust your gut! Use an immersion blender if you have one (skip if you’re using cream cheese).
Next, mix in the condensed milk.
Add the egg and essence.
Step 4:
Pour the mixture into the ready mould and bake in an electric oven for 40 minutes (Check alternative step below for microwave or no-bake recipe.)
The result should be wiggly but firm.
Microwave:
Never use steel in the microwave. Bake for around 5 minutes. The sides should be firm, and the centre should be wobbly.
No-bake:
Use 1/3rd cup of condensed milk instead and replace it with powdered milk and sugar. Do not use eggs. Results will be softer and somewhat melty.
Step 5:
Refrigerate for at least 6 hours or overnight.
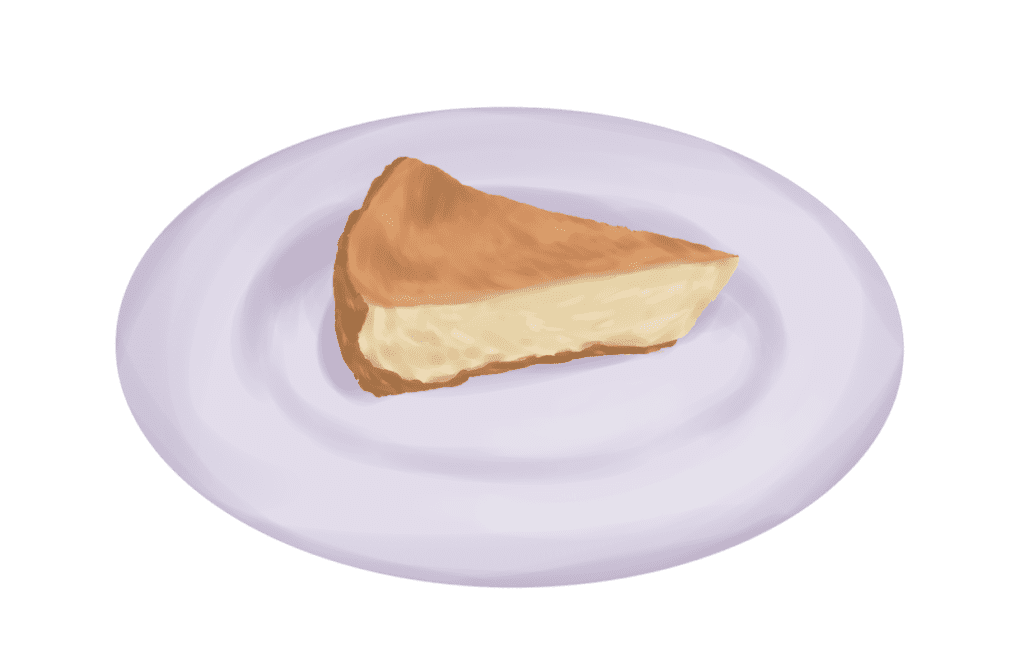
Add any toppings you like. Go crazy!
Share with your loved ones, or eat by yourself, if you’re mad at them. Don’t forget to show off, though!
Follow The Interlude for more!


Can’t wait to try this out!
AAAA love how detailed this recipe is!